To test the app before an release, we will set up so-called “internal testers” that can be invited to test the app. If you have already added these testers, you can skip to step X.
Step 1. Create Testers List
If you’ve already created your testers list, skip to step 2.
- Select App Releases on the left menu
- Scroll down to Internal Test Track and select Manage and then Create List.
- Type a name for the list.
- Add email addresses separated by commas or click Upload CSV. If you use a .CSV file, put each email address on its own line without any commas. If you upload a .CSV file, it will overwrite any email addresses you’ve added.
- Select Create list.
Step 2. Add testers to test your app
- Select App Releases on the left menu
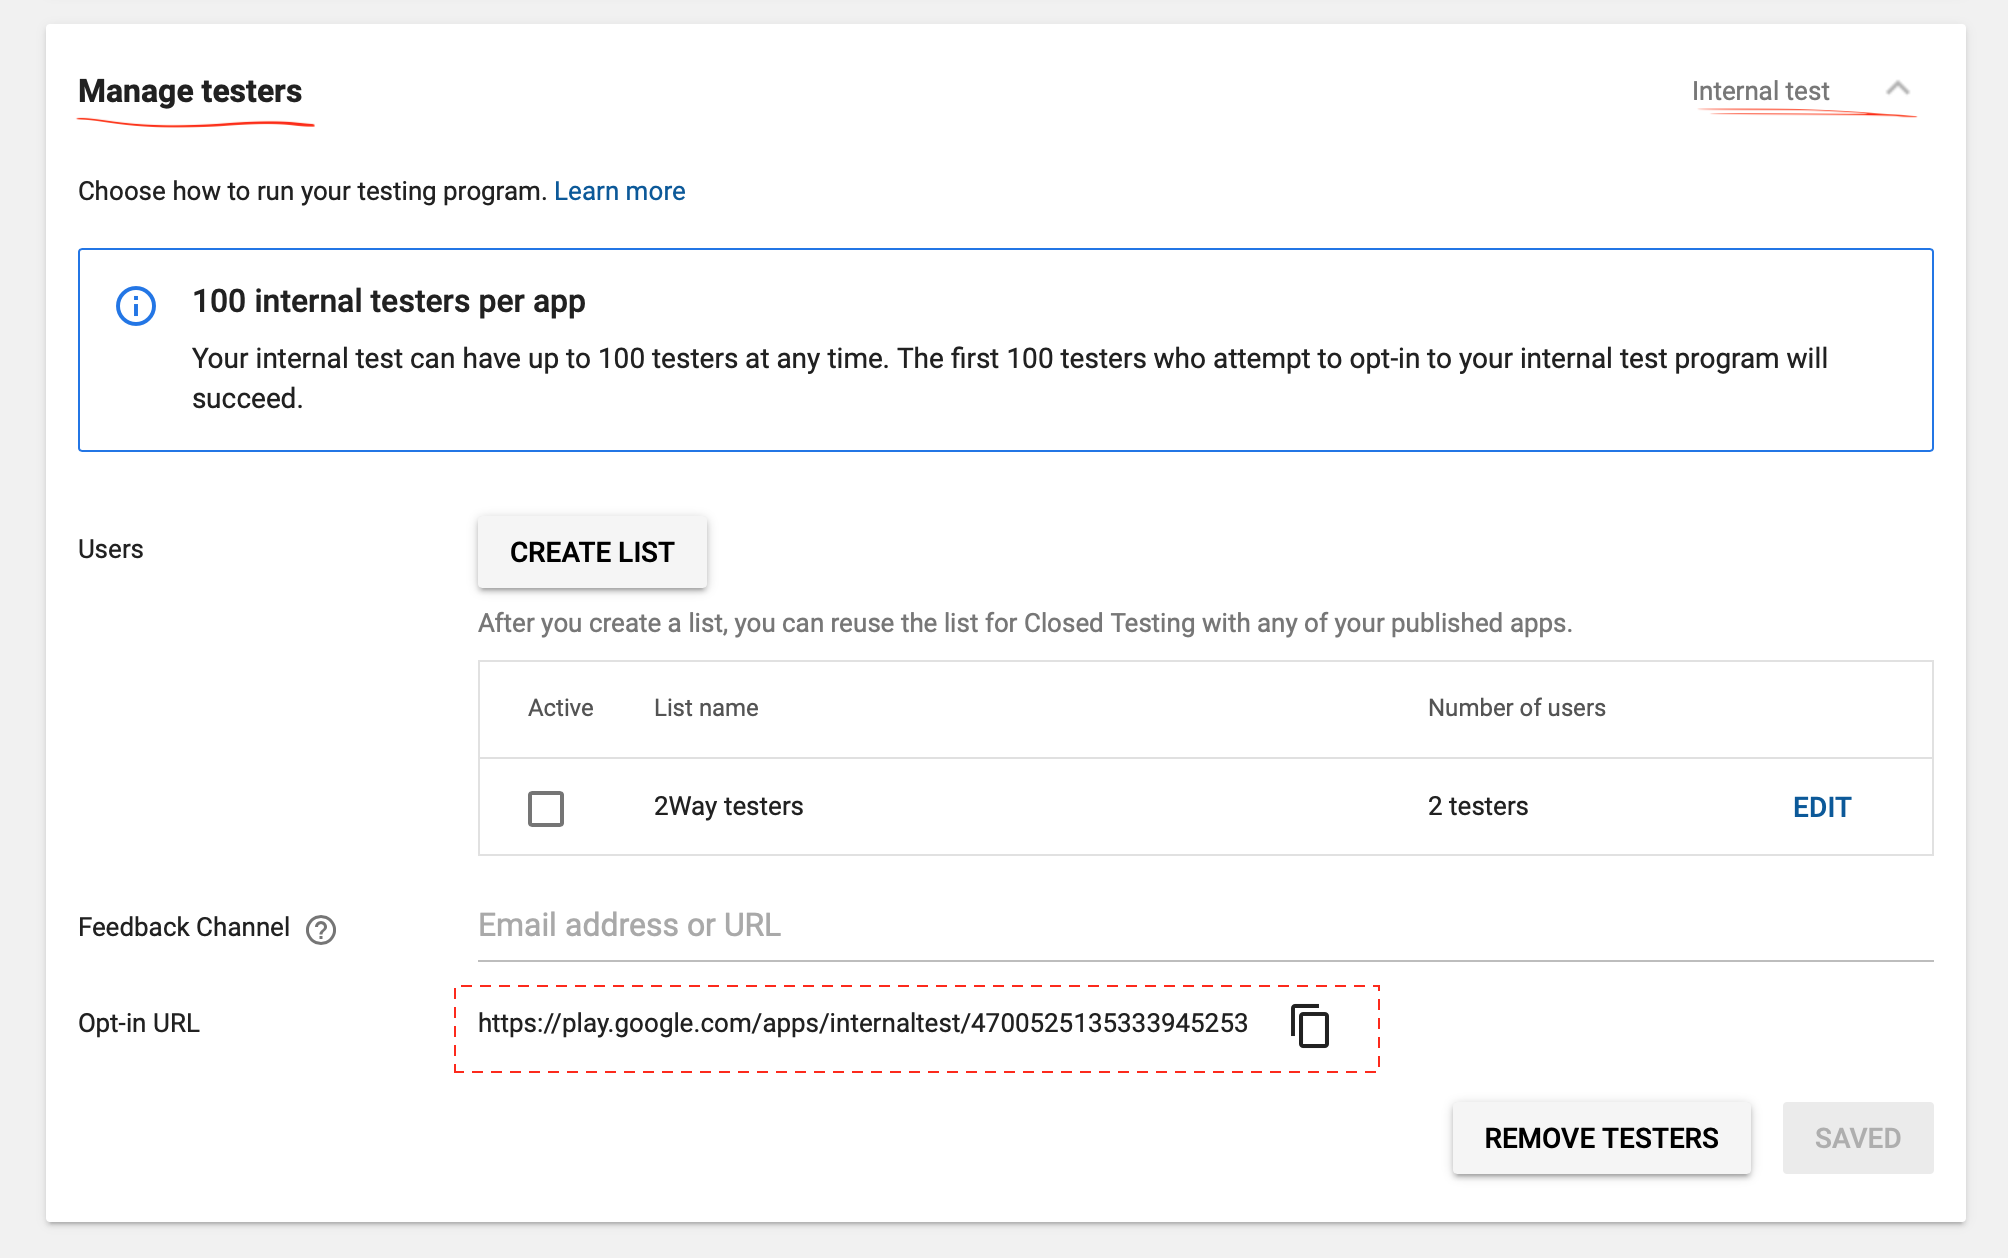
- Next to the internal test track, Edit Release. If you need to add Tester to the Testers list created earlier, select Manage and then Edit next to the list.
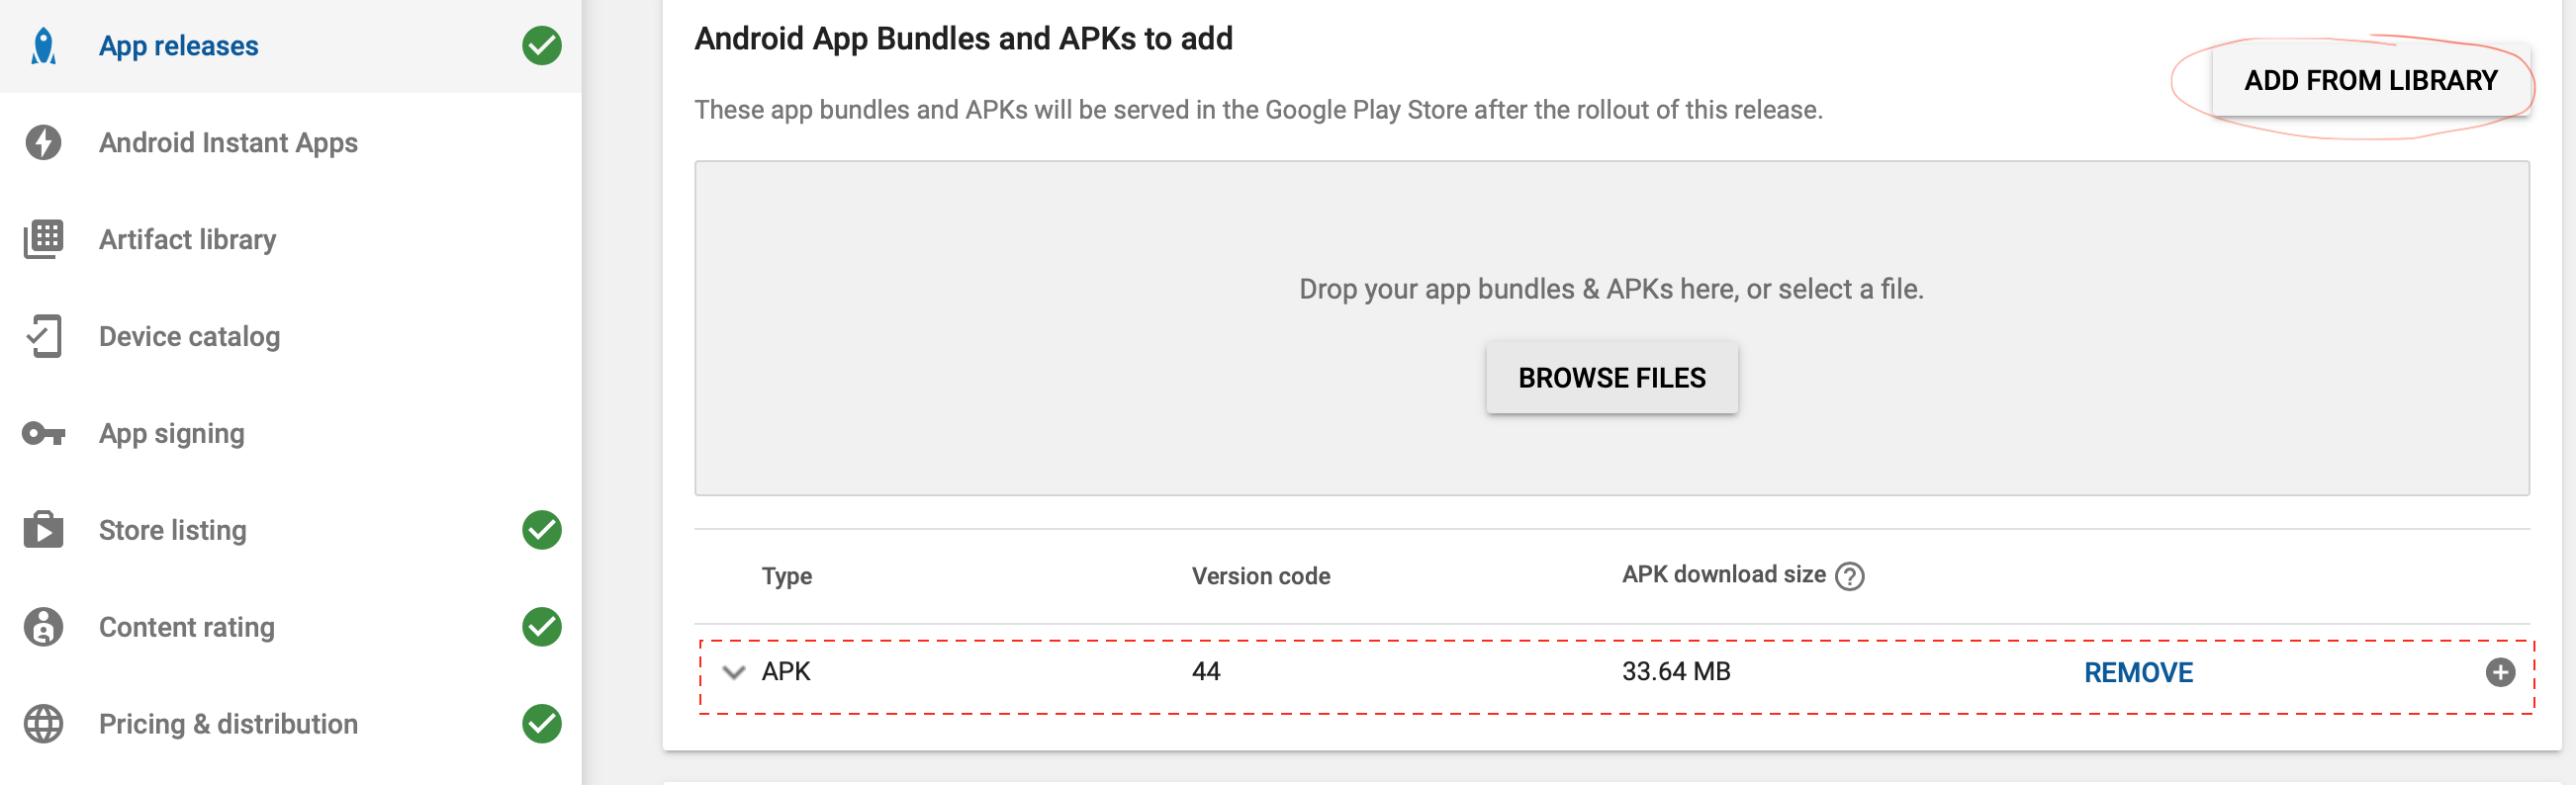
- If your app build has been uploaded, select Add From Library and select the latest build. It should appear as shown below.
- Add the Release name, such as the version number for this build. This is normally done by 2Way developers.
- Add “What’s new in this release” text to inform your users of any significant changes in this version. If this is the first release, then a simple text like “First release” or “Welcome to your app” would do.
- Select “Save” and then “Review”
- If all is ok, then select “Start Rollout to Internal Test”
- Testers should get a notification or you can copy the “opt-in” link from the Internal Test section and send to the testers. See below.
When testing is done, it’s time to release your app to “Production” or Live. See details for that in this article.